Back to blog
•
5 min read
Building a Vanilla JavaScript Client for Asynchronous Request-Reply Pattern - Part 3
Learn how to create a vanilla JavaScript client that interacts with our Azure Functions API implementing the Asynchronous Request-Reply pattern.

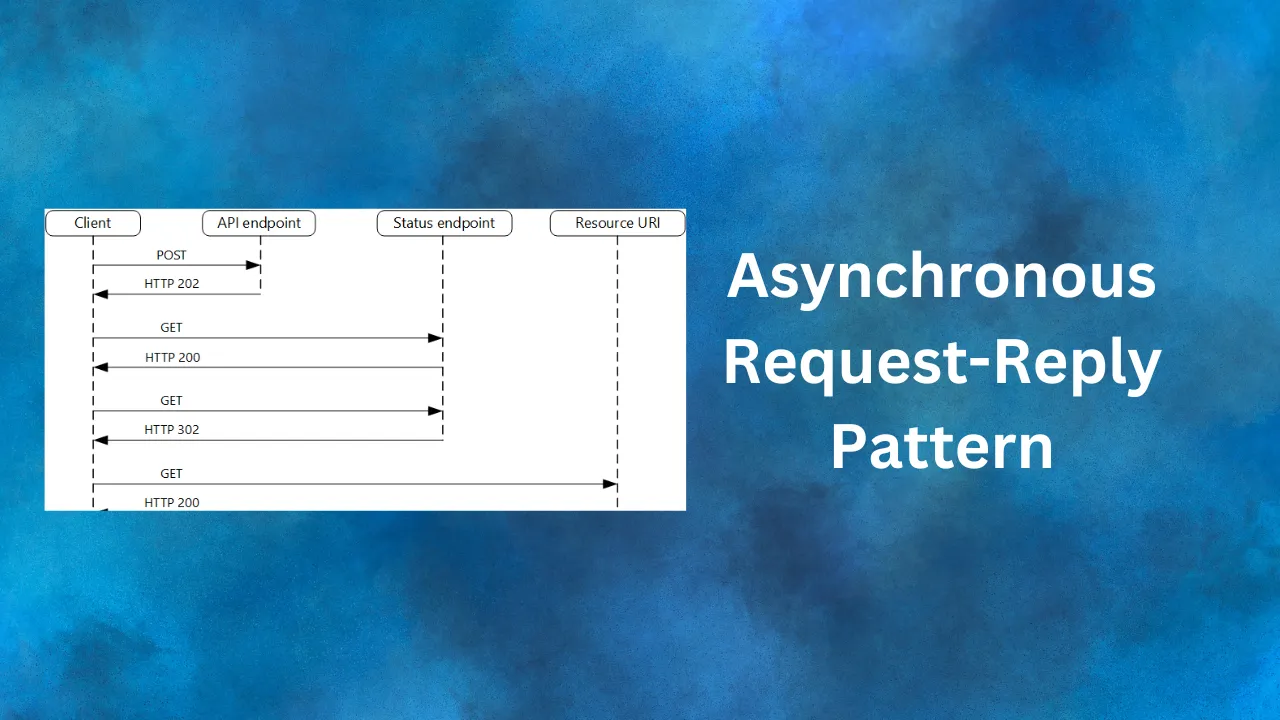
In Parts 1 and 2 of our series, we explored the Asynchronous Request-Reply pattern and implemented it using Azure Functions. Now, let’s complete our implementation by creating a vanilla JavaScript client that interacts with our API.
GitHub Repository
The complete source code for this project, including the Azure Functions backend and the vanilla JavaScript client, is available on GitHub:
Async Request-Reply Pattern Demo Repository
Feel free to clone, fork, or star the repository if you find it useful!
Setting Up the HTML Structure
First, we’ll create a simple HTML structure for our client interface:
<!DOCTYPE html>
<html lang="en">
<head>
    <meta charset="UTF-8">
    <meta name="viewport" content="width=device-width, initial-scale=1.0">
    <title>Async Request-Reply Demo</title>
    <style>
        body {
            font-family: Arial, sans-serif;
            max-width: 800px;
            margin: 0 auto;
            padding: 20px;
        }
        button {
            padding: 10px 20px;
            font-size: 16px;
        }
        #status, #result {
            margin-top: 20px;
        }
    </style>
</head>
<body>
    <h1>Asynchronous Request-Reply Pattern Demo</h1>
    <button id="submitBtn">Submit Request</button>
    <div id="status"></div>
    <div id="result"></div>

    <script src="index.js"></script>
</body>
</html>
This HTML file creates a simple interface with a submit button and areas to display the status and result of our request.
Implementing the Client-Side JavaScript
Now, let’s create the index.js file to handle the client-side logic:
const submitBtn = document.getElementById('submitBtn');
const statusDiv = document.getElementById('status');
const resultDiv = document.getElementById('result');

let isProcessing = false;

submitBtn.addEventListener('click', () => {
    if (!isProcessing) {
        submitRequest();
    } else {
        statusDiv.textContent = 'A request is already in progress. Please wait.';
    }
});

async function submitRequest() {
    isProcessing = true;
    statusDiv.textContent = 'Submitting request...';
    resultDiv.textContent = '';

    try {
        const response = await fetch("http://localhost:7279/api/SubmitRequest", {
            method: 'POST'
        });

        if (response.ok) {
            const location = response.headers.get('Location');
            const retryAfter = parseInt(response.headers.get('Retry-After'), 10) * 1000;

            statusDiv.textContent = 'Request accepted. Checking status...';
            setTimeout(() => checkResult(location, retryAfter), retryAfter);
        } else {
            throw new Error('Failed to submit request');
        }
    } catch (error) {
        statusDiv.textContent = `Error: ${error.message}`;
        isProcessing = false;
    }
}

async function checkResult(location, retryAfter) {
    try {
        const response = await fetch(location, { redirect: 'follow' });

        if (response.ok) {
            if (response.url.includes('GetResult')) {
                // We've been redirected to the GetResult endpoint
                const result = await response.text();
                statusDiv.textContent = 'Processing completed.';
                resultDiv.textContent = `Result: ${result}`;
                isProcessing = false;
            } else {
                // Still processing
                statusDiv.textContent = 'Still processing. Checking again...';
                setTimeout(() => checkResult(location, retryAfter), retryAfter);
            }
        } else {
            throw new Error(`Unexpected response: ${response.status} ${response.statusText}`);
        }
    } catch (error) {
        statusDiv.textContent = `Error: ${error.message}`;
        isProcessing = false;
    }
}
Key Components of the Client Implementation
Event Listener: We add a click event listener to the submit button, which triggers the request process.
submitRequest Function: This function initiates the long-running process by sending a POST request to our SubmitRequest Azure Function.
checkResult Function: This function polls the CheckResult endpoint, following redirects if the process is complete.
Error Handling: We implement basic error handling to provide feedback to the user if something goes wrong.
State Management: We use the
isProcessingflag to prevent multiple simultaneous requests.
How It Works
- When the user clicks the “Submit Request” button, the
submitRequestfunction is called. - This function sends a POST request to the SubmitRequest endpoint.
- If successful, it starts polling the CheckResult endpoint at the interval specified by the Retry-After header.
- The
checkResultfunction continues to poll until it receives a redirect to the GetResult endpoint. - Once redirected, it fetches and displays the final result.
Video Demonstration
Here’s a video walkthrough of the Asynchronous Request-Reply pattern implementation:
Conclusion
This vanilla JavaScript implementation demonstrates how to interact with our Azure Functions API that implements the Asynchronous Request-Reply pattern. It handles the entire lifecycle of the request, from submission to result retrieval, providing a smooth user experience for long-running processes.
By using this pattern, we can handle time-consuming operations without blocking the user interface, improving the overall responsiveness of our application.
Additional Considerations
- Error Handling: In a production environment, you’d want to implement more robust error handling and provide more detailed feedback to the user.
- Cancellation: Consider implementing a way for users to cancel long-running requests.
- Progress Updates: For very long-running processes, you might want to implement a way to provide progress updates to the user.
- Timeout Handling: Implement a maximum timeout for the entire process to prevent indefinite waiting.
With this client-side implementation, we’ve now completed our full-stack demonstration of the Asynchronous Request-Reply pattern. This approach can be adapted and expanded to handle a wide variety of long-running processes in your web applications.